Schedules |
  
|
Schedules |
|
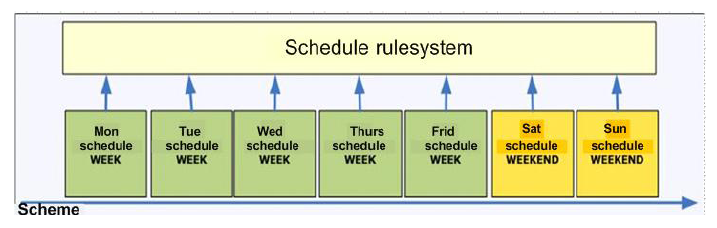
Schedules determine the various borders of how an employee is normally expected to work. In this way one can define different blocks with start and stop times in a scheme of your choice, such as:
•sliding time start and end
•core time start and end
•break boundaries
•overtime limits
•etc.
Scheme:
One can use schedules in daily management to:
•insert a correction to a standard scheme
•set up a dynamic schedule planning
Step 1:
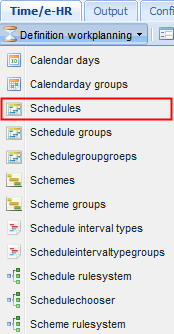
Go to the screen Time/e-HR and click on the tab “Definition workplanning”. Next you click on “Schedules”.
Step 2:
Next you click on the icon ![]() .
.
Step 3:
•Schedule: unique key identifier (unique number), automatically generated; e.g. “106”.
•Add a description to the day schedule, e.g. “Day schedule Employees”. Here, we can enter an abbreviation of maximum 2 characters and an abbreviation of up to 6 characters maximum.
•Starttime offset: at offset 00:00 the day schedule is default defined from midnight to midnight. When there is a starttime offset defined here, the bookings will fall into this day schedule from this time on, for example starts at 03:00h. If you should book before the beginning of this time, the bookings will appear before this day schedule.
For example:
Someone wants to define the overtime an employee makes between 1am and 6am within the day schedule that may run past midnight until 6am. This person is working overtime on Wednesday at 5h and the starttime offset of the day schedule is set on 06:00, then these overtime hours will be calculated within the day schedule of Tuesday. Likewise when he for example works overtime on Friday until 6am, this overtime will be added to the day schedule of Thursday.
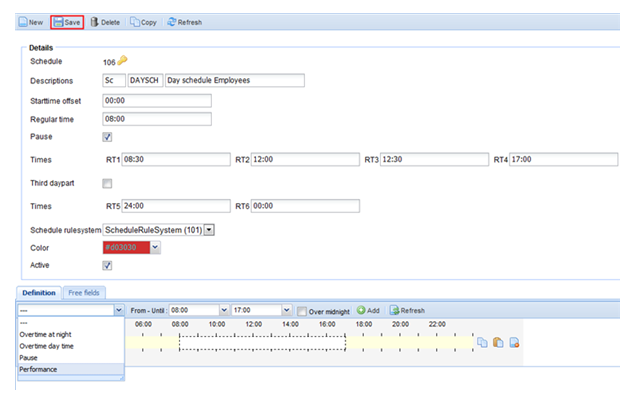
•Enter the performance period of the grid at “Regular time”, e.g. 08:00.
•Click on the option pause when the employee (whether or not mandatory) takes a break.
•Fill in the work times of the schedule:
example: (Regular time 1) RT1: 08:30
(Regular time 2) RT2: 12:00
(Regular time 3) RT3: 12:30
(Regular time 4) RT4: 17:00
•Third day part: this is checked if the employee also works in the third day time of the schedule, e.g. he works in the example above also from 18:00h until 20:00h:
Example: (Regular time 5) RT5: 18:00
(Regular time 6) RT6: 20:00
•Schedule rulesystem: how any registrations and/or entered corrections (absences, bookings, etc.)
are being processed to daily results and period results are determined by the schedule rulesystem, which refers to the day schedule. Here we refer to the schedule rulesystem that is applicable.
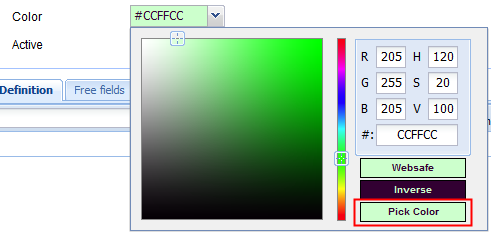
•Then you choose a color you prefer. In assigning colors to schedules, you always need to click on “Pick Color” to be able to adjust the color.
Step 4:
•At the bottom in the schedule we click on the button “Add” every time and we assign the times of the schedule in the field “From-Until”. Next we indicate the name of this timeline, e.g. the block “Performance”.
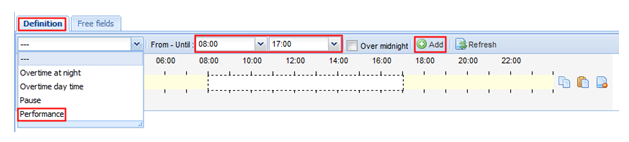
oWhen we click on “Over midnight, the performance can be marked over midnight in the timeline.
oYou can copy a row by clicking on the following icon: ![]()
oYou can paste a row by clicking on the following icon: ![]()
oYou can delete a row again by clicking on the following icon: ![]()
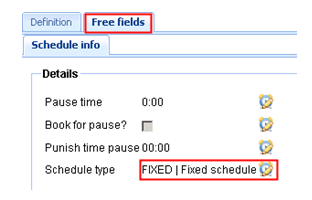
•Under the tab “Free fields” we can define whether or not the employee must book for a pause, we can identify the type of schedule, e.g. a flexible schedule, a fixed schedule, etc. These free fields can be defined in consultation with your software implementer.
Example of how a fixed schedule can look like:
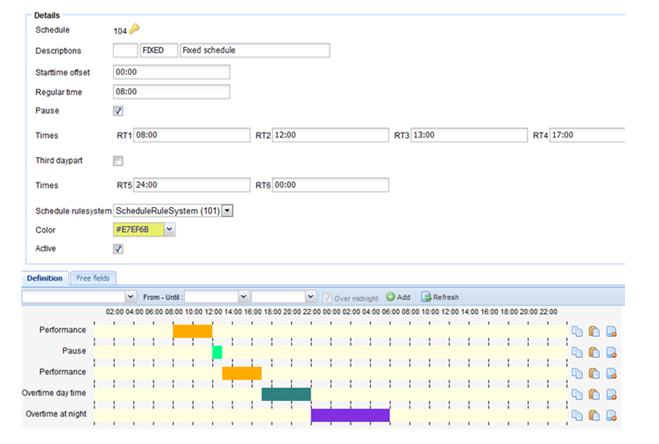
In this schedule we see that the performance (“performance”) is running from 8:00h until 12:00h and from 13:00h until 17:00h.
There is a fixed pause from 12:00h until 13:00h.
Extra overtime during the day is from 17:00h until 22:00h and extra overtime at night is from 22:00h until 06:00h.
Example of how a flexible schedule can look like:
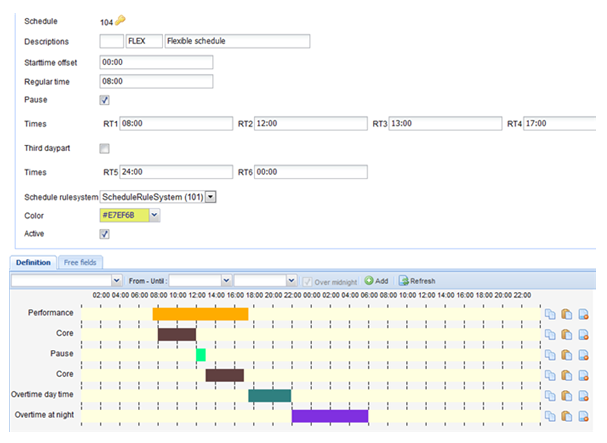
In this schedule we see that one can be flexible (“performance”) between 07:30h and 17:30h.
The regular times (core) are between 8:00h until 12:00h and from 13:00h until 17:00h.
There is a fixed pause from 12:00h until 13:00h.
Extra overtime during the day is from 17:30h until 22:00h and extra overtime at night is from 22:00h until 06:00h.
Step 5:
Finally you click on top at the button ![]() , after which your new schedule is created.
, after which your new schedule is created.