Schemes |
  
|
Schemes |
|
A scheme consists of a cyclic repetition of schedules. The cycle can be an easy week cycle as in the scheme above, a two week cycle, a 3 shift system, a cycle of any length, etc.
So the scheme includes a work planning for the employee, in which every schedule determines on every day how someone has to work that day.
After we have created the schedule, we can define the scheme.
Step 1:
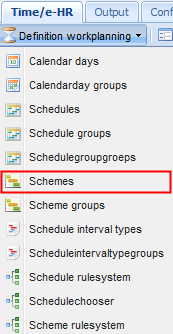
Go to the screen “Time/e-HR” and click on the tab “Definition workplanning”. Next you click on “Schemes”.
Step 2:
Next you click on the icon ![]() .
.
Step 3:
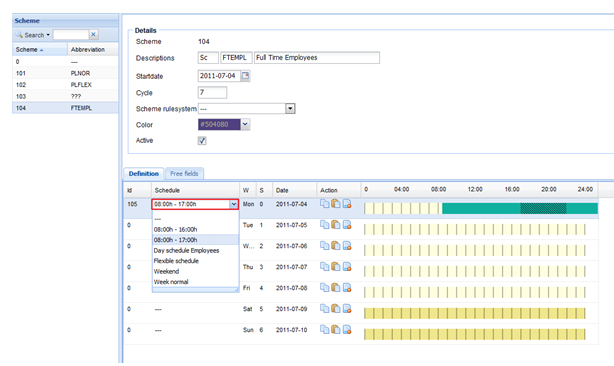
•Scheme: unique key identifier (unique number), automatically generated; e.g. “104”. ![]()
•Add a description to the scheme, e.g. “Full Time Employees”. ![]()
Here we can enter a short abbreviation of maximum 2 characters and an abbreviation of up to 6 characters maximum.
•Set up a cycle for the scheme, e.g. “7” ![]() for a weekly recurring scheme; “14” for a two weekly recurring schedule. For a two weekly recurring scheme two schemes appear under neat each other, that both must be filled out.
for a weekly recurring scheme; “14” for a two weekly recurring schedule. For a two weekly recurring scheme two schemes appear under neat each other, that both must be filled out.
•Indicate per day in the scheme which schedule is applicable. E.g. Monday is the schedule “Mon: 08:00h – 17:00h” – start at 8h, stop at 17h applicable. We do this by clicking on the day and by selecting the previously created schedule and we do this for each day.
•In case there are days with the same schedule, we can copy a line and paste it to these days with the same schedule applicable via the icons mentioned at each line:
![]() : copy row: here we click on the icon to copy the current row.
: copy row: here we click on the icon to copy the current row.
![]() : paste row: here we click on the icon to paste the copied row to this row.
: paste row: here we click on the icon to paste the copied row to this row.
![]() : delete row: here we click on the icon to delete the row, when e.g. a row doesn’t contain the correct schedule.
: delete row: here we click on the icon to delete the row, when e.g. a row doesn’t contain the correct schedule.
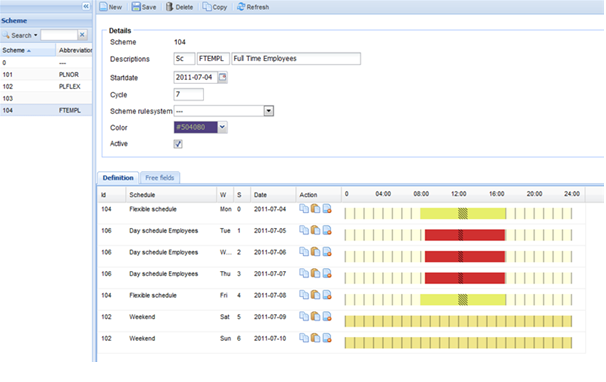
•Example of a scheme:
•Finally you click at the top on the button ![]() and your new scheme is created.
and your new scheme is created.
Step 4:
•Assign new scheme: before the scheme can start for the employee, we need to assign the scheme to the employee in the screen “Employees” under the tab “Employees”.
•We click on the name of the employee in the employee list.
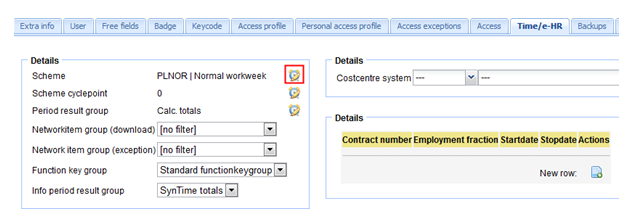
•In the detail screen on the right we then click on the tab “Time/e-HR” where we can adjust the scheme by clicking on the icon![]() Example:
Example:
•The next popup appears:
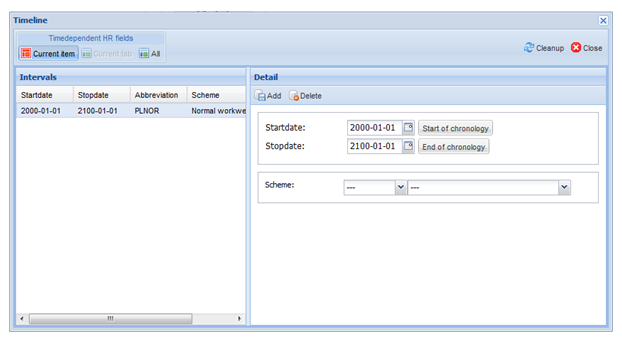
Here we assign the start date of the new scheme and (if necessary) the stop date of the new scheme.
•Next we click on the relevant scheme that we have created and on the button ![]() , as in this example:
, as in this example:

•Finally we click on the button ![]() on the right top. Your new scheme is now assigned to the employee.
on the right top. Your new scheme is now assigned to the employee.